The low-voltage wiring rough-in is pretty much done; here are the two "cans" in my wife's closet:

The can on the left is for cable\satellite and phone; the one on the right is for networking and the intercom system. The blue "smurf tubes" go from the bottom of each can down into the crawl space, but both are empty: they're there for future extensibility only.
The camera wiring is in my closet; I'm not using a "can" for these, since I expect the PoE networking switches to generate quite a bit of heat:
 Looks like a lot of cameras, huh? I am pre-wired for about eight exterior cameras, and a ton more of interior cameras. The exterior cameras require two wires, since most exterior cameras require a heated housing (or else they'd just fog up and be useless). After some of the contractors saw all of this wiring, I started hearing jokes like "where do you want us to cut the holes for the machine-gun ports?" Ha-ha. :-) I don't plan to hook all of these up, that might get a bit Orwellian, but I did want the ability to capture video of key spots like doors, garage, etc.
There are two 2" smurf tubes leading from attic crawl in the main part of the house, and another one in the kitchen part of the house. I am really glad these are in, it will make future wiring much more painless:
 That round hole in the wall, to the left of the orange smurf tube, is for an exterior electrical receptacle. There are several of those around the house, unfortunately the building code does not allow us to use the black-painted trim blocks like for the lights; it has to be a specially-made, exterior-rated, electrical receptacle. Which won't look as nice as the trim blocks, but the code needs to be followed.
This next picture is of a ceiling corner in the game room:
 Obviously there is a ton of low-voltage wiring, but you can also see the insulated (silver-wrapped) high-velocity A/C tube, and the yellow-capped, orange PVC piping for the sprinkler system. There are a specifically calculated number of A/C outlets (the specific # depends on heat loss calculations) and sprinkler heads (the specific # depends on requiring complete coverage of the floor) in each room; as an example, the game room has six A/C outlets and four sprinkler heads. Each type will be covered with a reasonably nice-looking trim ring after final installation.
This picture is of the downstairs closet underneath the stairs; you can see that there is a receptacle box and a low-voltage mud-ring up high on the wall:
 I plan to put a shelf under that spot so I can plug in a wireless network access point. The guest bedroom closet upstairs has similar provisions.
Talking to the propane tank company rep on Friday (ordered the tank, more on that below) gave me a lot of good info, mainly about the need to properly size the interior gas supply lines for the needs of the various appliances. Well, we won't have any gas-fired appliances other than the generator, but he advised me to look carefully into the btu\hour requirements of whatever appliances I thought I might want to add in the future. He also suggested that I up-size the supply line from the tank from 1/2" to 3/4", just on the basis of the generator needs alone (the line from the tank to the house is under high pressure, so 1/2" to 3/4" is quite a jump; a regulator controls the supply at the point where the line enters the house).
Also on Friday, I finalized the interior gas piping stub-out plans:
- Boiler (backup heat source for chiller on very cold days)
- Water heater
- Cooktop
- Oven
- Downstairs laundry room (for dryer)
- Upstairs laundry room (ditto)
- Future fireplace stub-out
- Rear porch BBQ grill supply
- Generator
Only the generator and the BBQ will actually be run off of propane when we initially move in; the rest of the stub-outs are for future expandability. The generator specs say that a 1 1/4" supply line will be required, and same for a high-draw (200k btu\hour) tankless water heater (obviously that would be a peak-load figure for the water heater). The rest of the appliances seem to need much less.
Speaking of the generator...I decided after more thought, that I just wasn't willing to only have one of my two electrical panels be generator-enabled. So I've asked Joe our electrician to remove the current non-generator panel and replace it with a generator-enabled model. This will be costly, but I decided I didn't want to take the risk of kicking myself down the road for not doing it now. Fortunately Joe had not yet started wiring the panels. In conjunction with this decision, I ordered a Kohler 17kw generator which should be more than sufficient for our needs even in the middle of a dark, cold, power-less winter.
The final part of this decision chain was that once I decided to up-size the generator, I then decided to upgrade to a large, 1000 gallon underground propane tank, which also got ordered on Friday. The rough-in hole for this monster is huge: 5' wide by 6' deep by 18' long (!). Delivery\installation is scheduled for Wednesday September 30th, I will definitely try to be on hand for that event. (And even if we never need to run on generator - a chance I'm not willing to take - we'll have enough propane to run the BBQ for the rest of our lives. :)
The A/C guys have so far been working upstairs. I didn't have a ladder handy so I didn't get up into the attic space, so these pictures are all from below. This is the A/C return duct for upstairs:
 Pretty big, huh? Well, bigger is better so that the "whooshing" sound is minimized. The A\C guys are also installing the exhaust fans; I heard one refer to them as "fart fans" - made me laugh when I heard that. I'll be sure to use that jargon from now on. As previously mentioned, all of these will be super-quiet Panasonic units; here's the guest bedroom exhaust fan:
 Here's a view of the "mechanical corner" in the garage:
 The white box next to the blue water pressure tank is a laundry tub. To the right of the door, behind the roll of tubing, is our new reverse-cycle chiller, waiting for its concrete pad to be poured so it can be bolted down. The chiller was smaller than I expected - tall but relatively narrow.
In the same picture above, if you look carefully at the plastic water tank to the right of the blue tank, you can see that it's almost full of water; I wasn't around for this, apparently the guys were doing some testing of the pipes by hooking up the well pump to temporary power. It is a busy little corner of the garage but it is looking pretty well organized, so I am happy.
For the central vacuum system, we ended up with two outlets upstairs, three downstairs, and two "toe-kick" panels underneath cabinets. This is what the roughed-in outlets look like:
 The septic field work was delayed a bit, since the track hoe that Brad was using suffered some cracks on its bucket arms (both sides); someone must have come out and welded some temporary repair plates over the cracks:
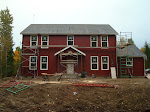
 Finally, the siding progress continues, here it's on the western side of the house:
 That's all I got for now.
 It's hard to see in the above picture, but all of the rebar that touches\connects to the foundation wall, has been inserted into pre-drilled holes in the foundation. This helps to "lock" the porch slab to the foundation and prevent settling - a nice touch, I would not have thought of that.
  The small slab to the right in the above picture will be where the chiller and generator sit.
 Looking at this now, I kinda wish we had moved the door more to the center of the opening, or perhaps even more toward the right. It is an outward opening door and it looks like it will be a bit awkward to stand in front of the door and open it at the same time. Ah well, if this is the worst mistake we find I won't kick myself too hard. :)
 And finally, the rear porch:
  This next picture is of our nearly-completed electric panels:
 I know it's not porch or concrete related, but it just looks so darn cool I couldn't resist . At my last count, we have something like ~55 circuits in this house...