Friday, November 27, 2009

Various things

Here's a summary of the latest progress this past week (in addition to the granite slab installation, that is - see previous post).

The hose-nick that occured in the smaller downstairs office (as mentioned in some comments to the previous post) has been repaired:

I wish things like this wouldn't happen, but the repair job looks pretty durable to me. The hardwood guys have replaced the hardwood planks and given the office floor its two coats of sealer.

The garage attic access stairs are done:

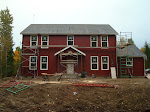
The puddle in the foreground is actually on the exact spot I had intended to relocate my boat building tent to - clearly I will need a better base than that! I plan to buy a few dump-truck loads of rock and gravel to firm things up.

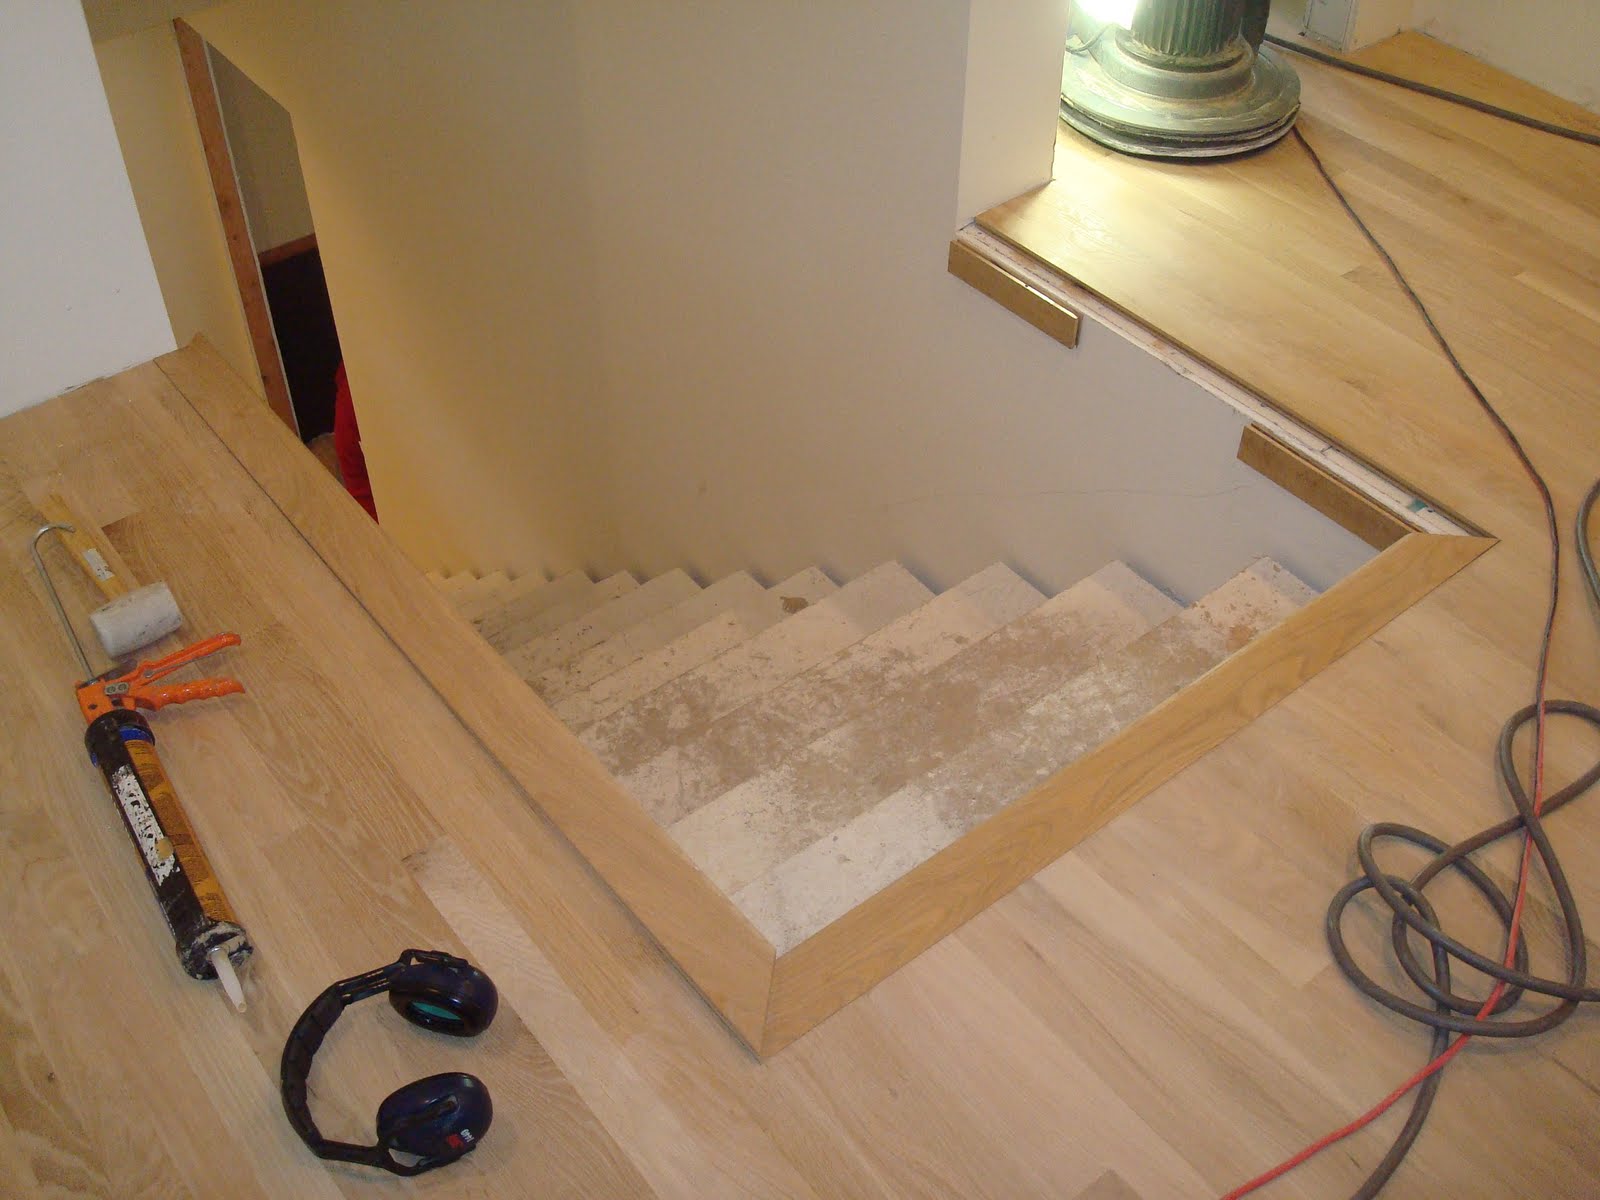
Covering the stairs with hardwood in in progress:

The stairs will be sanded and finished exactly the same as the hardwood floors were. And obviously, hand-rails and newel posts will be added as well.

Lots of progress is being made on tile, both in laying tile and in grouting the earlier areas. This is the floor of the upstairs guest bathroom:

I've come to realize that the master bathroom, especially the shower, comprises a huge amount of tile work. Dan is making good progress on things though:

The kitchen area is the largest tile area to be done, but steady progress is being made:

The kitchen is the only place we are doing that simple "offset" pattern, but I'm glad we did it there - it breaks things up a bit.

Interior doors have started getting installed:

Some minor issues have arisen: the Kitchen-Aid range hood we selected is nowhere in stock, and will require a 30+ day lead time to order it from the factory. I'm in the process of selecting an alternative brand so we don't have to wait on that. Also, it appears that nobody was aware that we wanted double-doors for the upstairs game room. Lots of little details to keep track of as we get closer to the finish line.

Granite slabs installed

On Thanksgiving Day, the granite crew came out (I guess they don't celebrate turkey-day) and installed our granite slabs. We were out at the house when they showed up; at first I thought someone had called 911 to report an accident:

This is a good sign though, because it means the contractor\company is serious about keeping costs down. I'm pretty sure that a second-hand ambulance is cheaper than a brand new truck.

Here's our slabs in the back of the truck:

I don't think I'd want to work with granite myself - the stuff is obviously very heavy, and you'd have to be very careful to not let yourself get old before your time. These guys do seem to have a lot of tricks to make things easier though:

The granite crew is not yet entirely done, since the majority of our sinks and faucets are not here yet. I'll share some pictures of how things look at the moment though. This is the master bathroom vanity:

Kitchen counter:

The kitchen island with the "desk" in the background:

Upstairs shared bathroom:

Downstairs "powder" bathroom (I'm really not keen on that "powder" terminology):

We are pleased with how everything has turned out.

Sunday, November 22, 2009

Tile setting begins

The hardwood guys worked yesterday to lay down the second coat of sealer (both upstairs and downstairs), and will be starting to install hardwood on the stairs next. In the meantime, Paul and his crew have started setting tile in place. Here Paul (job superintendent) and I (on the left) are laying out the tile mural for the master bathroom shower:

Paul Lewing (the artist) makes it easy to assemble the proper layout; though most of it was pretty obvious in our case, he numbers each tile on the back and provides a layout diagram so that no mistakes should be possible:

This is the mural all laid out on the floor:

The three loose tiles at the bottom are accent tiles that will placed around the perimeter of the tub deck. From the right, they are a catamaran, a ferry (a common sight on Puget Sound waters, in case you've never been here), and the Mukilteo lighthouse. When my wife and I were dating we used to spend a lot of time down at the Mukilteo beach next to the lighthouse and this brings back lots of fun memories. Ah those teenage years... :)

See the sunken ship on the bottom? I asked Paul to model that on the USS Constitution - I've always been fascinated with the age of sail and the USS Constitution is a marvelous ship that is still accessible to the public; I highly recommend a visit if you ever find yourself in the Boston area. (I also want to see HMS Victory someday, but find myself a bit short on cash at the moment for a European vacation...)

We are very happy with how the mural has turned out. It will make a really unique and personal touch for our bathroom.

Tile setting in other rooms has also been going on. This is the upstairs laundry room:

I asked Paul, and he said they were planning to set all of the tile first, then go back and grout.

This is the upstairs guest bedroom bathroom:

Here's a good view of the floor in one of the upstairs bedrooms:

That is not the final "look" of the floor...the above will be buffed, and then a third final coat of sealer will be applied near the end of the job. Sasha the floor guy was careful to caution me about this, so we wouldn't get alarmed that this would be the final appearance. So far it looks good, but I am a bit surprised at how much the grain raised. Hopefully the final sealer coat will really level things out.

Our appliances have been delivered and are waiting in the garage:

The garage remains a minor disaster zone, with two chop saw stations plus a tile saw...

...but I'm sure it will all get cleaned up nicely when things are done :).

Last but not least, we've finally finished selecting all of the light fixtures. The kitchen island pendants took some searching before we decided that we both liked the "Kana" onyx shade pendant from Tech Lighting. There will be three of these hanging over the island. The sales folks at the Kirkland Crescent Lighting showroom were quite helpful during the process, but I'm glad it's over. One more thing done! :)

Friday, November 20, 2009

Hardwood floor progress

The nailing down of the raw oak wood planks\strips is just the first step. After that, the floor gets sanded, then gaps and imperfections get filled with a wood filler, then more sanding, then "buffing" (uses a 100 grit "screen"), finally followed by the actual sealer coats.

Paul had mentioned that sometimes the floor crews will trowel a coat of filler across the entire floor, but our crew only did spot filling:

This was just the first pass around the room perimeter, which gets sanded down first with a small hand-held sander.

This is the goop they use:

The buffer machine at work:

The bullnose edging around the top of the stairs was the last thing to get done before the second floor sealer coats could be done. Here the pieces are getting dryfitted:

The joints were then rough-sanded, then coated with filler like the rest of the floors. This is Sasha (the owner of the company, Quality Flooring) - sanding down the dried filler...

...followed by a buffing job like everywhere else. The edges, nooks, and crannies were hand-sanded.

With that done, things were nearly ready for the first coat of sealer. All that remained was to do a meticulous cleaning job. I watched Sasha and his crew do the cleanup and I could not have done a better job myself: first they did a very careful vacuum job of every square inch of floor, including going around the room perimeters with a nozzle to suck out any dust, followed by a final pickup with a specially made dust-mop. The vacuum got almost everything, but even with the dust mop they frequently stopped to vacuum the bottom of the dust mop itself - wow. I was impressed to see that.

Now it was time for the first coat of sealer, and this was the part I was waiting for. There are several types of floor finishes, but I had always wanted the famed "Swedish" finish. Apparently these days they have the traditional Swedish, along with new water-based formulas. The floor guys said either choice would be durable and attractive, but it was my choice. In the end, I decided to go with the traditional Swedish formula. This stuff has been used forever, like easily 40+ years, and is time-tested. Glitsa is the supplier and they are a local Seattle company.

If you look around on the Glitsa web site, you will see that they have multiple different coating options, which vary essentially by # of coats, types of coats, # of days needed for application, etc. I did my best to research the options and decided that two coats of Glitsa Sealer followed by a coat of Glitsa Gold Seal would work great. Sasha confirmed this as a good option and said it's what he normally uses. :-)

Here's the Glitsa Sealer with its hardener component:

Finally, the moment of truth! Here the very first sealer coat is getting applied:

Sasha said that the color above will be very, very close to the final color. It looks great, and makes me happy we didn't spend the money for extra stain.

The brush in the picture above is used for edging and tight spots. A lambs-wool applicator is used for covering the majority of the floor:

I like this picture as a nice contrast of the raw wood and the coated wood:

One of the big drawbacks of this stuff is the smell....it is a very strong chemical, and I didn't have a respirator mask. So I only lasted about ten minutes before deciding it was a good time to leave :).

There will be two coats of sealer (with a sand and buff job after each coat), then the floor guys will be done until later, right before the house is almost done. Then they come back to do the final coat and buff it out.

Saturday, November 14, 2009

Cabinets and stuff

The cabinets were delivered earlier in the week and are now all installed. This is the desk area in the kitchen:

The kitchen is looking great:

Another kitchen view from a different angle:

Here's a detail shot of the crown and rope-style molding that will be installed at the top of the kitchen cabinets:

One corner of the laundry room:

The countertop in the laundry room will be covered in 6" field tiles, including a matching backsplash, with a nice wood edge. We didn't want to spend more money for granite for this room, but I am sure the tile will look great.

Also in the picture above, the open area under the counter will be left that way as a convienent place to store clothes hampers. The corner cabinet looks a bit awkward, but has two rotating shelves ("Lazy Susans") to make it easier to use the space.

If you look carefully at some of the pictures above, you can see that all of the cabinets have been installed on top of 2" spacers. This is done in order is to raise the countertops to a more "adult friendly" height (i.e., you don't have to bend over quite so far). All of the base cabinets on the first floor (except the kitchen desk) have been done this way.

The hardwood guys have finished nailing down the raw wood and will be starting the finish process on Monday. So far we are thrilled with how the floors are looking (plus the house has a nice "oak-ey" smell to it right now):

The floors look even and flat from a standing viewpoint, but if you get down close you can see that there is a lot of work left to really produce that super-smooth finish that everyone associates with hardwood floors. This picture of my office was taken at floor level:

The finishing process involves sanding, filling, more sanding, cleaning, varnishing, and at some point near the end, a buffing job to really put the shine on things. Hopefully I can get some pictures of these things as they're happening.

Monday, November 9, 2009

Hardwood flooring started

Not sure when the hardwood guys started, but when I got there they were working their way through an upstairs bedroom:

The flooring looks nice! And it feels great to walk on something other than warmboard for a change. We've decided to not stain the floors any darker, ie we're leaving them natural. This will save some money, and also hopefully lighten up some of the darker areas of the house.

The low-voltage guys were also out doing some work; this is what our intercom systems look like:
Looks like most of the phone\data\cable plates have been trimmed out too.

This is Dan, working on our master bathroom shower floor:

The layer of thinset\sand from before was covered with a rubber membrane, which was then covered with more thinset\sand - and I'm not quite sure what comes next! :) There's some chicken wire in there for reinforcement as well. Dan seems to be doing a very meticulous job, which I like (don't need any leaks popping up!).

The auxiliary boiler for our radiant heating system has been installed in the garage:

It looks to be an exciting week...

Sunday, November 8, 2009

Appliance choices

I just sent Paul the final-final list for appliance choices, and wanted to capture it here. (I use the term "final-final" since I once sent him a "final" plumbing fixture list that turned out to need revisions - hence the new term, "final-final".)

As I mentioned a long time ago, my wife and I have long been fans of KitchenAid appliances, and we are pretty much sticking with that brand. This is one area where we definitely saved some money in the budget. For example, our freestanding refrigerator will likely cost around $1800 - which is way, WAY cheaper than say, a $10k SubZero model. I don't mean to pick on SubZero specifically, but I'm really doubtful that we will be able to discern a difference between cold SubZero food and cold KitchenAid food. Also, I think the free-standing models are far cheaper and easier to repair or replace: if it ever dies, just slide out the old one and slide in the new one.

Now that I've got that bit of refrigerator philosophy off my chest, here's the choices we made:

36" induction cooktop model# KICU568SBL (in black - wasn't available in white)
(the induction part is what makes this so cool....I hope we don't have to replace too many of our pots and pans though....)

36" under-cabinet range hood: model #KHTU160KWH (in white)
(nothing special, just your basic range hood)

30" Double convection oven: model #KEBS208SWH (in white)
(double ovens....imagine how fast my wife will be able to bake for me with these babies! :))

Refrigerator model #KFIS25XVWH (in white)
(this fridge is a fairly new style, with the freezer on the bottom - drawer style - and the upper refrigerator portion accessed by french-style doors. I hope we like it....)

Garbage disposer: model #KCDS075T
(nothing too interesting, just a good 3/4 HP model...though I'm not sure if we're even supposed to use one of these since we're on a septic system)

Dishwasher: model# KUDS40CVWH (in white)
(An interesting choice to be made these days, is whether you want a food grinder in your dishwasher. Traditional models have always had them, but apparently the key selling point in dishwashers is decibel levels - so manufacturers advertise "super quiet" models w/o the grinder. Usually this means the food debris gets collected in a filter which then requires semi-regular cleaning. We got a grinder model.)

Freezer: Frigidaire model# GLFH21F8HW (in white)
(KitchenAid doesn't make a freezer, so we let the salesman help pick this out)

We will be bringing our current (Maytag) washer and dryer with us for the downstairs laundry room. For the upstairs laundry room, we'll probably pick up some basic Sears models after we move in. My wife made a good comment about not wanting to get expensive models for teenage boys doing laundry for the first time... :).

Tile and grout choices

This will probably bore everyone to tears, but I wanted to capture our exact tile and grout color choices here on the blog. Most folks won't care, but this way I have a nice permanent record in case I ever need to get additional material.

Kitchen\laundry room\breakfast nook:
- Tile: SurfaceArt "Venetian Classics - Cathedral Stone - Pierre"
- Grout: #135 "Mushroom"

Kitchen backsplash:
- Tile: DalTile "Matte Urban Putty" (code 0761)
- Grout color: #382 "Bone"

Downstairs powder bathroom:
- Tile: SurfaceArt "Venetian Concepts - Capri - Sand"
- Grout color: #122 "Linen"

Master bathroom floor\wall:
- Tile: SurfaceArt "Venetian Select - Portofino Coast - Gray"
- Grout color: #301 "Artic Ice"

Master bathroom shower surround:
- Tile: DalTile "Matte Desert Gray" (code x714)
- Grout color: #301 "Artic Ice"

Entryway:
- Tile: SurfaceArt "Rustic Slate Beige"
- Grout color: #180 "Sandstone"

Upstairs laundry room and shared bathroom:
- Tile: SurfaceArt "Venetica Classics - Tuscany - Crema"
- Grout color: #101 "Quartz"

Upstairs private guest bathroom:
- Tile: SurfaceArt "Venetian Select - Portofino Coase - Ivory"
- Grout color: #386 "Oyster Grey"

Obviously we really liked the "SurfaceArt" brand (although we did feel a bit weird, picking out tiles that have such a strong Italian theme for our Colonial-style house); you can find a link to their site in the side bar. For the grout colors we simply chose the kind carried by DalTile, which turns out to be produced by Custom Building Products. I asked Paul to only use epoxy-based grout; it's more expensive, but doesn't require sealing and should stay nicer over the long term.

More trim, ready for hardwood and tile

The rooms that get a chair rub rail are starting to look awesome:

That is my office above, and yes I am very happy with how the colors turned out.

This is the trench used to bury the drain tube leading from the propane tank:

The finish grading around the house has been started; here, only the tops of the septic tank access covers are visible anymore:

We've been having a lot of rain lately and we're still getting quite a bit of puddling here and there around the house. Paul told me not to worry, and just be patient until the finish grading is completely finished, since that will help the water drain away from the house and reduce puddling.

The septic drain field has also been all covered up; if you didn't know any better, it would look like a nice park or playground:

We've purchased a second Ford Explorer; this one a bit nicer than the other one I showed previously, and will likely become my daily driver. Both are top-of-the-line (well, for ten years ago anyway) "Limited" editions. I like it, these are nice rigs:

I'm glad we're done used-car shopping; it takes up a lot of time.

A bit more work has been done in the master bathroom. Here the sand\thinset bed for the shower floor has been laid:

My wife asked for a small step to be added in front of the tub surround, and you can see that in the picture above as well.

We dropped off the tile for the murals yesterday to Paul Lewing, and he says he'll be done in about a week or so. After that, we stopped by the DalTile showroom in Seattle, taking samples of all of our tile choices, and finalized the grout colors. We are sticking with "neutral" choices, ie, the grout is close as possible to the tile color. We're just not feeling that adventurous anymore, I guess, or maybe we're tired out. :)

This is our blue-on-blue dining room, with the windows trimmed out, chair rail installed, and with crown molding as well:

Sorry, that picture is a bit dark. I think the whole house will look much better once we have some interior lighting installed. The crown molding looks so cool though, I had to share - wish we had enough budget to do crown in every room. Oh yes - those small round holes on the ceiling are the trim pieces for the high-velocity A/C ducts.

This next week will be a busy one. Hardwood installers will be starting on Monday, cabinet delivery is scheduled for Monday or Tuesday, and Paul will be starting floor tile installation (working around the hardwood guys). Appliances will be ordered tomorrow as well - in fact, I need to get done here and send Paul the 100% final appliance spec list.

The propane tank passed its inspection, and has been completely covered up. I called the propane company Friday to schedule the final hookup (to the house piping) but they were having computer difficulties, so need to call back. I've also been trying to get the phone company out here to hook up our DSL internet - I want to have that ready to go nice and early, so I don't go into internet withdrawals after we move :). I've also been talking with David from Symmetric Electric, having him get ready to come back out and hook up the low-voltage wiring (phone, cable, and data). Phew - lots going on, but I'm feeling like the finish line is nearly in sight.