Friday, August 28, 2009

Roof completed

The roof now has all of its shingles, so I no longer need to be afraid of rain - yay! Here's how the back of the house looks now:

In the picture above, you can see my anenometer poking thru the roof to the far right. :-) In this picture of the main house attic space, you can also see the anenometer support pipe at the far end:

The rectangular opening is for the attic access stairway. When I was up in the garage attic space, it certainly felt nice and large, but I still had to duck slightly under the trusses. In comparison, the main house attic feels even bigger - lots of space and no ducking required.

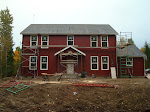
Obviously, the housewrap (Tyvek) has started going on as well. This is from the side:

This is some sort of rubber membrane around the bottom of the side covered porch area; I think (need to confirm) that is to protect the house when a concrete porch surface is poured in here:

The opening for my garage attic access door has been rough-framed:

More progress has been made on the plumbing work too. Here's some rough-in work on the master-bathroom wall:

As mentioned before, the plumbing is being done in PEX, not copper piping. Blue tubing is for cold water, red for hot.

The one-piece tub-showers for the upstairs bathrooms have been man-handled into rough position; this sometimes requires temporarily removing studs to make room (studs were removed to the left in this picture):

One issue that came up was the fact that neither the plumber nor the heating contractor had provided for a water heater in their bids (not sure what happened, maybe it was a "I thought the other guy was going to cover that" type of situation). I know tankless heaters are all the rage right now, but I still have doubts about payback period. Even Navien's website only advertised about $80 a year savings over a tank-style heater; modern tank-style heaters may have a bad reputation these days, but the facts seem to suggest that they are mighty efficient for what they do. I mention Navien because we did get a quote for a top of the line Navien tankless water heater, but it was just too much money - I could have replaced a normal tank-style water at least twice before coming close to that amount. Yes, I'm sure that cheaper tankless options exist, but in the end I decided to go with a standard tank-style water heater. The only decision left then was propane-fired vs electric, and I went with electric: so far I've added nothing to the house that requires propane, which may be useful if I need to defer purchase and installation of the propane tank due to finances. Paul did mention that we will need at least a 65-gallon water tank heater, due to the need to supply the jetted bathtub that will be installed in the master bathroom. Sounds good to us - we both like long hot showers.

We are also installing a hot-water re-circulation system. so that there's no delay in hot water supply when you turn on the tap. This is a luxury that does cost money, both upfront and ongoing (since you're losing heat\energy when the system pumps hot water around the house that doesn't get used). OTOH, I'm guessing that the plumbing supply lines to our master bathroom will be at least 50-60' long by the time they're snaked through and around all of the various obstacles. I'm willing to pay a bit each month to not have to wait for hot water in my bathroom....

Couple more plumbing luxuries: we will have several outside water faucets, and one of the faucets near the front of the garage will have both hot and cold water, to make it easier to wash cars. Of course, I'm not sure this is much of an advantage: out here in the woods, your car will never stay clean... :)

We also spent some time this week selecting garage doors. Northwest Door is a local manufacturer and we picked one of their steel-faced, insulated, "Therma-Classic" models. These are "carriage-style" doors that should match the colonial look of the house pretty well. I also picked out some good quality, belt-drive, Liftmaster garage door openers.

Finally, this next week should be very busy - siding will be started, and windows and doors will be installed. Stay tuned...

Tuesday, August 25, 2009

Roofing continues

I had once figured that as soon the second story was on, I'd be able to see more stuff than just trees around the house. It didn't work out that way. Then I figured that from the roof, I'd be able to see more stuff. Again, not really:

The picture above is looking eastwards....nice view of the trees though. Here's a nice view of how the house and the well 'driveway' are located respect to each other:

In addition to roofing, the heating guys are onsite routing all of the radiant tubing and installing the control manifolds. Here's a bunch of tucked-up tubing:

This is one of the control manifolds:

The manifolds have to be accessible for service, so most or all of them are located in closet-areas and will be covered with an access panel, instead of being drywalled-over.

An extra support beam has been added underneath the stairs:

These are the water storage tanks; the blue metal tank is a self-pressurized one for normal house-hold drinking water, and the plastic tank is simple storage for the fire sprinkler system:

While my quest for a roof-top mounted sprinkler system isn't looking so good, an interior sprinkler system is still required by local code. IIRC, this is because we do not have adequate road access for a fire truck to reach our house and then have enough room to turn around and leave. Oh yeah, the fact that there's no public fire hydrants nearby doesn't help either.

Finally, our fiber-cement siding has been delivered:

Dawn and I spent a bunch of time yesterday looking at plumbing specs and styles, before finally settling down on a list. Originally we had planned to go with Kohler everywhere, but switched to Moen in the bathrooms due to style issues. This may end up saving us some money too.

Saturday, August 22, 2009

Roof started

The plumbers have been busy drilling lots of holes to run their stuff through. The single-piece tub-showers for the upstairs are staged in the garage:

In the upper left of the above picture, you can see that the "mechanical wall" has been drywalled. Good to have that done before all of the plumbing and manifold stuff starts getting attached there. A bunch of other plumbing supplies have been staged in the garage as well, including a 86 gallon water storage tank from Amtrol. More of that later as the stuff gets installed.

The roofing has begun, although so far it's only the back-side of the garage roof:

I like the roof color. You can also see our paint test panel on the backside of the garage in the picture above. We think we might have gone a bit too dark, but time will tell.

It also looks like Paul has finished priming and painting all of the soffit areas...I've taken some pictures of those areas but they didn't turn out so great (the pictures, that is).

Some additional bracing has been added to many of the outside walls:

We are having to make some decisions about upgrades on various things. The attic trusses were one such item, and the exterior door for the garage attic is another. The original bid had 7" reveal siding (fiber-cement siding), and we changed that to 4", primarily since I think it looks more authentic for this style of house. Naturally that costs more money, partially due to extra material (each piece of siding covers less surface area, so you're paying for more "overlap" area, and also more pieces means more install labor.). I also need to decide on the final electrical plan - lots of choices, and on my initial take I went crazy with can lights which added more than I expected. Decisions, decisions! :-)

Wednesday, August 19, 2009

Roof is "loaded"

Paul mentioned today that the roof is "loaded" and that the roofers will be starting no later than Monday. Perhaps I wasn't thinking, so I asked if that meant that all of the shingles are loaded on a truck at the supplier? No, it means that the bundles of shingles have all been hoisted to strategic spots on the roof:

It could have been worse - I could have asked if "loaded" meant that our shingles had a lot of add-on features... :)

As mentioned before, we are going with a basic but high-quality shingle, in a basic black. I didn't know the exact type until today: "RoofShake 40" shingles from IKO brand, in their "Dual Black" color (the shingle tabs alternate in color between dark and light black). It will look fine, I'm not worried. They come with a 40 year warranty, which is fine.

The front porch is starting to take shape:

The plumbers have started working too...here's some of the kitchen rough-in:

The pipe coming out of the floor is for an island sink drain (that might have been obvious, but hey). Also, the window above the kitchen sink looked a bit low, and I sent an email to Paul asking if we needed to raise that a bit.

Well, enough blogging for now: I need to go confirm some shower valve choices (these need to installed during rough-in...).

Sunday, August 16, 2009

Keep on trussing

The trusses are stood up over the second story portion of the house, but not yet sheathed. We had some rain last week which was slowing things down I'm sure. Nevertheless we can now see the final exterior views starting to take shape. Here is the front of the house:

Side:

Here's the back porch view:

In the picture above, if you count the open spaces between the trusses, and start from the left, you will see that the ninth space is wider than the rest. This area was framed wider to accomodate the Bessler sliding attic stairway that I talked about in a previous post.

I spent some time this weekend assembling the support post for my weather station anenometer. I made it out of 1" galvanised plumbing pipe, with a U-turn at the top so that the sensor cable could be routed inside of the pipe with no leaks. When I had the rough assembly all done in the garage at home, we went out to the site so I could calibrate it with a compass (so that the anenometer will report accurate wind direction data). This is a picture of me with my anenometer:

The pipe is 10' long and I plan to have 5' below the roof for support, and the other 5' above the roof (4' above the roofline is the advised minimum to have accurate readings). I did not permanently mount it yet; will talk with Paul in the morning to see when the best time to do that is.

This is my garage attic space:

Paul is going to put together a bid\budget for what it would take to build a set of stairs (U-shaped with a small landing) for access to the garage storage space.

Wednesday, August 12, 2009

Roof taking shape

Roof sheathing is moving along rapidly, over the garage and one-story portions of the house. The second story trusses have not yet been stood up. Here's some of the kitchen area sheathed over, and they even have some of the pre-primed fascia installed:

End view of the garage - check out my attic truss space :):

Back view of the garage; the small strip of plywood along the bottom is for appearance's sake, so that the open soffits look nice (nicer than OSB would, anyway) from below:

Good view of how the trusses, fascia, and bird-blocks get installed (this is over the kitchen area):

One of the reasons we drove out to the house this afternoon, was to do some on-site paint color checking. Paul was asking us to choose exterior paint colors soon, so that he can move into that phase quickly. When it comes to color-matching and choosing, I am pretty much helpless (artsy stuff was never my forte - can't even match socks to save my life), and to a large extent I just don't care (I'm more concerned with the structural aspects of the house). That said, my personal criteria for house colors was something that would be semi-traditional for this style of house, and something that would NOT blend into the surrounding woods. We're building a nice house - I want it to stand out when we drive up to it! White is very traditional for colonial style houses, but not our favorite. So anyway, we got a bunch of possible paint samples from a store and took them out to look:

My initial preference has always been to go with a dark red as the base siding color. After much discussion, my wife is being very kind and is going to let me go with it. Of the samples above, check out the left hand set, bottom sample, right-hand color. The color to the left of it is a nice dark gray\slate, and that will be our accent color. (We're not using the fire-engine red color to the far left, that was too much). A very light gray will be used if we need a third accent color. If you think we're making a huge mistake, don't bother to tell us - paint choices are always subjective, and if we don't like it after a few years, we can always re-paint it! :-)

Monday, August 10, 2009

Truss work begun

I took today off from work so I could be onsite when the trusses were delivered. They were supposed to be there at 7 am, but ended up running late and didn't show up until 10am. The crew filled the time with odd jobs, and I was even handed a hammer so I could take down some of the temporary bracing that was no longer needed; then I went around hunting for sheathing nails that had missed their stud, and pounded these back out so they could be fixed later.

One of the odd jobs was securely attaching the earthquake straps. Previously when I had seen these straps, I figured they'd get 5-10 nails and that would be good enough - wrong! Check this out:

Every strap is nailed like that. Paul mentioned that crews don't like these straps, because they cause "bulges" that show through the finish siding that will be sided later. It's unavoidable due to code requirements though...

Another odd job that got worked on was installation of all remaining exterior sheathing (I think it's all on now). At one point Paul checked the plans and noticed that our interior "TV wall" was designated as a "shear wall". This means it gets extra sheathing reinforcement:

Another odd job was drilling holes and attaching foundation bolts through the walls\subfloor:

This is a somewhat exploratory process: the guy above drills a hole in approximately the right location, and another guy below guides him if he's not exactly in the right spot (hence the second hole in the picture above).

The truss package was big enough that two trucks were required. The first one had a crane and a smaller sized-load:

The small trusses on top are for the rear porch. The iLevel Edge Gold plywood on the bottom will provide a floor for the attic areas over both house and garage. Other than this, the entire rough framing package has been delivered.

The second truck had the bigger trusses, so I'll save pictures for that phase. Since the second truck was late, Paul put the crane on the first truck to work. Here they're installing the rear porch-roof support beam:

If you look at the far left of the beam, you can see that it's been cut into an "L"-shape, and you can also see the beam "pocket" on top of the wall intended to receive it. Everything aligned perfectly: the guys had the beam in the notches and were taking the chains off the beam within sixty seconds after it had left the ground - nice work! They also used the crane to lift a bundle of roof sheathing to the second floor.

The second truck was the momma load, containing all of the big trusses for the house and garage:

I watched many bundles of trusses get hoisted up to the house and garage today; it's wonderful what modern big machinery is capable of. While I can't share all of the pictures, this one is pretty good:

That was a big bundle of trusses; the crane operator guesstimated it weighed ~4500 lbs or so. He said it's not uncommon for the rear wheels\supports of the truck to leave the ground when moving such a big load over a long "reach" like this. Fortunately nothing bad happened today. Here's how it looked after the truss guys left:

After a short lunch break, the crew started standing up trusses. One of the first things to go up was the half-trusses that go over the rear porch roof:

The full-sized trusses are more of a handful. My impression of the process is that the first one (esp. on a gable end) is always the tricky one, then the rest go smoother. This is the gable-end over the kitchen; it has been toe-nailed to the top of the wall so it can be stood up later without kicking out, and is being supported horizontally with boards so it can be sheathed first:

After sheathing and being stood up and braced:

More of the kitchen roof trusses:

Kitchen roof area from the front (crew is working on breakfast nook roof area):

Garage trusses in progress:

I should not have tempted the rain gods with my dreams of a dry house during the framing phases. Our wonderful, once-in-a-lifetime Seattle summer was finally interrupted today with the arrival of our normal drizzle. Sigh....(although Paul told me not to worry, a day or two of dry weather and everything would dry out just fine). My wife and I drove out to take a look at the final truss progress for the day, mainly more trusses setup over the garage:

Oh yeah; on Paul's request, Brad came out and dumped some gravel in front of the garage. This is to give the crew a nice place to walk in and out of the house, so that dirt traffic in the house stays manageable. Sure gives the place a "homey" feel, being able to drive all the way up to your garage. :-)

Friday, August 7, 2009

Ready for trusses

Lots of progress this past week. I was out at the site Tuesday morning and then again today; upstairs framing is done, temporary power is hooked up, well-water line has been connected to the house, and I met with the electrician to start going over the details on the bid.

From Tuesday morning, here's part of the front wall getting made up:

The pre-attached exterior sheathing is left long, so that after the wall is stood up the sheathing will cover the height of the joists below:

Paul and crew getting ready to use a wall-jack to stand up the wall:

This is the northwest bedroom and its walk-in closet:

On Thursday, the power company came and installed our transformer and hooked up temporary power. I'm sure the crew won't miss the droning sound of the generator:

I had been envisioning the buried propane tank to be on the north side of the house somewhere (beyond the garage), but wasn't comfortable with the idea since I want to have a gravel driveway in that general location someday. Paul suggested instead locating the tank behind the transformer box (to the right of it in the picture above), which was a good idea. Plus there is still some woods left in that area, so hopefully we can hide it a bit from view. And it will still be easy for service trucks to get to.

The crew had a day off today, but I did meet with the electrician (Joe from Pro Electric) on site this morning to go over rough electrical details. Joe was an easy guy to talk to; we walked around and discussed the details for almost two hours. My philosophy on electrical is simple: one 20 amp circuit per room for receptacle, and 15 amp circuits for lighting. May seem like overkill, but I like to have extra capacity for the future, and I just hate it when you plug in a vacuum cleaner and the lights go dim...although maybe this is just because I've just lived in poorly-wired houses all my life? :) I also specified a four (4) lights plus switch in the crawl space, and 3 lights plus switch in each attic storage space. Two circuits for later exterior use expansion (driveway lights, flagpole illumination, etc) will be installed as well. Kitchen of course will get the appropriate circuits for the various appliances, same with washer\dryer\freezer. Our "media wall" in the living room (fancy term for where the TV goes) will get an extra circuit or 2, as will my low-voltage panel area in my bedroom walk-in closet (I should have planned from the beginning for a dedicated low-voltage or mechanical room, darn it). My office will get two 20 amp circuits (lots of computers, toys, etc). Garage will get two 20 amp circuits for receptacles, and a 50 amp 220v circuit (e.g., for a welder when I buy one), with overhead lighting on different circuits. We walked around the house exterior and I specified locations for an approximate total of ~12 exterior lights. This seems like a lot but these are "average" light fixtures, and the house is pretty big - I reserve the right to add addtional "floods" for when I want to turn night into day :). There will also be at least 4 exterior receptacles. Panasonic fans will be used in all bathrooms and laundry-rooms, and I also asked for a Panasonic fan on a thermostat switch in my master bedroom closet (in case the networking equipment starts to over-heat things in there). (I've never seen or heard a Panasonic fan, but all the contractors I've talked to so far, just rave about them being top-of-the-line machines that you can barely hear when running).

Joe and I also discussed generators. I previously had been looking at Generac systems, but Joe said he normally sells and installs Kohler, and recommended it as being (in his experience) a quieter-running and more reliable generator than Generac. Not having any experience in this area, I'll probably just go with his opinion. He made an off-the-cuff, initial sizing recommendation for the generator (12kw model) but I will definitely double-check the math on that. Bigger is not always better though, beyond initial cost you also have to consider how long your propane tank can run the generator if power is out for a very long period.

Another thing that happened this week is that Brad and his crew (excavation) ran a water line, along with electrical conduit (with a string), from the well to the house. We are not very far away from having water availability:

I wish I could have been there to watch them install the water line, but oh well. In the background of this next picture, you can see the fresh "lane" they made in order to reach the well (and avoid having to dig up the new driveway):

The upstairs framing was completed yesterday as well. Looking westward along the front of the house:

We have a big triple-bank of windows in the game room too:

Panning right from the picture view above, you can see there are three additional but smaller-sized windows also in the game room:

The extra framing below the three small windows is because they were accidentally framed as large 6' high windows, and had to be reduced in size....stuff happens :).

This is my son Zach looking out from the game room windows:

And here you can see the game room windows aligned with the living room windows below (I think it will look cool):

Earlier this week, I also had to make a quick decision on an attic stairway for the main house. With such a large storage space (due to the attic trusses), a traditional 2'x2' access hole just wouldn't be sufficient. Plus, a 9' ceiling is pretty darn high if you are standing on the top step of a step-ladder to get thru the hole! The truss company has to know the rough-framed hole size for the stairway, so they can adjust and reinforce the trusses as necessary. And since Paul needed to order trusses ASAP so they could be here Monday, I had to decide quick. After some web browsing, I settled on a Bessler Model 70 sliding staircase. With the Bessler models, the entire staircase actually slides down from the ceiling, as opposed to a model that folds. This is nice because it can then support higher loads: 600lbs in fact, for the Model 70. Being such a big guy, this is important so that I can actually feel comfortable getting stuff up and down into the attic space. The attic stairway hole will be in the game room, lined up parallel with the joists, and will slide down and to the north (back) of the house. I hope I made a good choice with the Bessler - will not know for sure until the unit is installed, but Bessler is a well-known, American-made brand and has been in business for a long time.

As I said, lots of progress this week. Trusses are scheduled for delivery around 7am Monday morning; I am taking that day off from work so I can be on-site and watch them place the trusses (using a crane, although I believe Paul will have some extra crew available as well since this is a pretty big evolution). Should be fun.