Here's a cool picture of the main house attic, showing all of the high-velocity A/C air-exchanger in place and all of the ducting. I asked the installers to not string any ducts across the main storage area and they did a nice job:
 Did I mention before that there is a total of around 55 A/C ducts in the house? The number is a bit mind-boggling.
One of the more modern code requirements (I think, just guessing) is that every single wall cavity must be sealed tight so that in case of a fire in the cavity, the fire will either starve for lack of oxygen or at least move so slowly that it's easy for people to get out. One day we were out there and there was a guy going around with a huge can of spray foam sealing every single penetration. He was being quite fastidious about it too; I bet it was an all day job. Here's an example:
 Note how the side-ways penetrations are sealed too; you can also see a line of white caulk along the corner seam: every exterior corner in the house got that.
The "mechanical corner" has gotten more and more complicated looking:
 Here's the generator (on the left) and the reverse-cycle chiller on the right, not hooked up just yet:
 Due to some equipment troubles, the hole for the propane tank wasn't due in time and we to postpone that to 21st. So no pictures of the SS Propane Tank yet. :-)
On Monday and Tuesday of this week, the insulation was installed. As mentioned before, I chose a fiberglass blow-in style of insulation throughout the house, including the garage. I wasn't able to be there, but in essence the installers stretch a thin netting over the studs, poke a small hole in it, then stick a hose in the hole and fill up the cavity. Looking at the results today, I was very impressed! The insulation completely fills up the wall cavity and actually bulges out slightly against the netting. Here's a shot of the garage:
 Usually in an attic they use 100% loose, blown-in style insulation, but were unable to do that here in our house because of the plywood floors going down the middle of the attic trusses. So that's why you see the more traditional batting installed under the attic floor above. The blown-in stuff will still be installed off to either side of the attic floors.
Here's another insulation picture, looking from a master bedroom closet into the master bathroom:
 If you look to the left in the picture above, you can see a little bit how the insulation bulges out. I'm very glad I went with this insulation style! I am convinced that it will be far more energy efficient than the batt-style insulation, since there's almost zero chance of air-leaks this way.
The backside of the house has been almost completely sided, except for the porch area:
 Actually this next picture kinda shows the same thing, except that you can see that the garage storage door is installed:

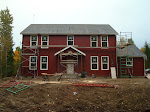
The crew has also finished off the siding on the far side of the house:

I'm sure this wasn't the most enjoyable job on the house; everything has to be done 20-30' in the air on scaffolding which is always a pain. The main part that's left to side is the upper-half of the front, then siding will be done! We are getting very excited to see some more paint on the exterior as well.
Paul made up some decorative dentils for all three porches; here's how it looks on the front porch, I think it will be a very nice touch:

Off to the side of the house, the two septic tanks have been installed but not yet hooked up:

No comments:
Post a Comment